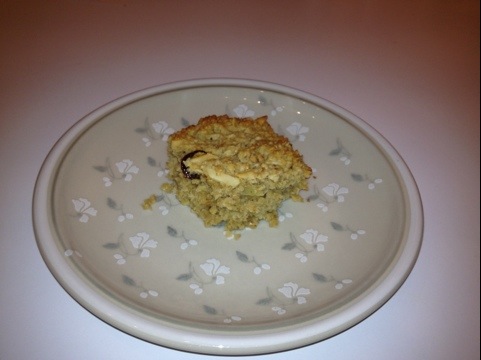
Coconut Chocolate Chip Cookies

20140714-111541-40541892.jpg

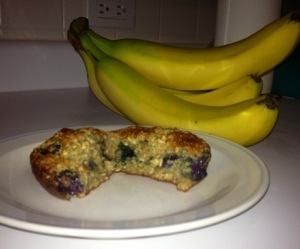
Good morning and happy Monday, sunshines! This lucky girl spent her weekend at a country music festival in the heart of Chicago’s West Town neighborhood. I was surrounded by good friends, great BBQ, awesome music, and the overwhelming smell of… Chocolate. Not what you expected at a country music/BBQ festival right?! Little known fact: Chicago’s River West neighborhood is home to Blommer Chocolate Company. There is a chocolate factory right on the river! With that said, my friends and I have been craving chocolate chip cookies all weekend! The whole festival smelled like a batch of Nestle break-and-bakes were sitting in the oven.

Since leaving the festival last night, I have been racking pinterest and some of my favorite food blogs to find a Diabetic Foodie worthy chocolate chip cookie recipe, and with a few nips and tucks I have one! These cookies boast all kinds of good-for-you ingredients while still satisfying that chocolate fix!

These little lovelies contain apple, banana, coconut, oats, almond milk, cinnamon and NO SUGAR or BUTTER! Can you imagine the vitamins and nutrients these yummy little guys have?! In these cookies, I used unsweetened apple sauce and mashed bananas, both of which are a commonly used substitute for sugar and eggs.

The apples in your apple sauce contain a great source of fiber, which will help keep you full longer! Plus they have high amounts of vitamin C to help keep your immunity up! Apple sauce can be substituted for the fats (butter, eggs) in most baked goods. The mashed bananas are a fantastic source of potassium which is an electrolyte required by the body to maintain healthy blood pressure. Bananas also help to control bloating and maintain healthy digestive tracks.

While I did include coconut in this recipe, it is completely optional! I myself am a big coconut person, but I know that can go one of two ways – you either love it or hate it! The nutrition information below reflects 1/2 cup of plain shredded coconut in this recipe, but feel free to leave that out! Just know that will lower the carbohydrate and the fat content (but coconut is good fat!).

What you will need:

3 ripe bananas mashed

1/3 cup of unsweetened apple sauce

2 cups rolled oats (look for the ones that say “gluten-free” on the packaging if you’re going for gluten-free, don’t assume)

1/4 cup unsweetened vanilla almond milk

1 tsp. vanilla extract

1 tbsp. cinnamon

1 cup dark chocolate chips

1/2 cup plain, unsweetened shredded coconut


Here’s the hard part: mix all of the ingredients into a bowl. Drop onto a cookie sheet. Bake at 350 for 18 minutes. This batch made 32 cookies that were approximately 1.5 inches in diameter. They do not rise or get any bigger in the oven (no baking soda, silly!) so when you drop them onto the cookie sheet they will stay exactly as they are.


Nutritional Facts Per 1 Cookie:

Calories: 72

Total Fat: 3.5 grams (2.3 gram saturated, .1 gram polyunsaturated, .1 grams monounsaturated)

Cholesterol: 0 mg

Sodium: 4.7 mg

Potassium: 37 mg

Total Carbohydrates: 10 grams

Protein: 0.8 grams

Bon Appétit!

-AF

Sweet Chili Seared Scallops & Warm Beet Salad: Green City Market

Set the scene on a rainy Wednesday morning. I biked through a cool mist south down Clark Street to the corner of Clark & Armitage where I docked my Divy. As I walked further south on Clark to a cluster of white tents it began to rain harder, and by the time I made it I was the only lunatic strolling through a rainy Green City Market.

20140618-181939-65979228.jpg

Green City Market was first opened in 1998 by chef and entrepreneur Abby Mandel. Mandel opened the market with just a few farmers in the alley next to the Chicago Theater. When the market expanded just a few years later it was moved to its current location in Lincoln Park, just a block or so south of Clark and Armitage. Abby Mandel passed in 2008 but the market has been going strong for 16 years now. With over 30 – 40 vendors on any given day Green City Market has tons of options for locally grown fruits and vegetables, baked goods, and dairy products such as the herbed goat cheese used in today’s recipe!

20140618-182026-66026585.jpg

I have always been a strong believer that the more natural color in a recipe, the more nutrients  — and the veggies showcased above (green onions, beets, icicle radishes, and purple asparagus) were all purchased at Green City Market this morning.

Green onions are heavy in the nutrients necessary to operate every single one of your body’s physiological systems. They also contain carotenoids which promote healthy vision.

Beets are high in potassium, magnesium, fiber, phosphorus, iron; vitamins A, B & C; beta-carotene, beta-cyanine, and folic acid and they can help to purify your blood and fight off the free radicals and toxins that cause cancer.

Radishes were not used in today’s recipe, I bought them to munch on – however the icicle radishes that I bought this morning are a bit spicier than the red ones normally found at the grocery store. Because of their high vitamin C content and natural cleansing effects, regular consumption of radishes can help prevent viral infections. As an elementary school teacher, I need all the virus fighting help I can get!

And yes, I know that asparagus is usually green– but I have been buying this purple stuff at the farmers market for the last few weeks and let me tell you, it’s delicious! Purple asparagus is a little sweeter than the green variety, it can be eaten cooked or raw, and it is so yummy roasted! Anthocyanin, the flavanoid responsible for the purple color in the asparagus is an antioxidant (it helps to remove all those cancer causing free radicals from your system).

For today’s recipe I used:

1 bunch of purple asparagus – purchased from Mick Klug Farms of St. Joseph, Michigan

1 green onion chopped – purchased from Green Acres Farm of North Judson, Indiana

1 bunch of beets  – purchased from Green Acres Farm 

4 tbsp. of Chili Jam from Savory Accents of Verona, Wisconsin

4 oz. of herbed goat cheese from Capriole of Greenville, Indiana

4 fresh sea scallops – not purchased at Green City Market

*The warm beet salad that was prepared makes enough for 2, the sea scallops which include the chili jam were only one serving. It should be noted that the nutrition facts below are for one serving (i.e. half the salad and all 4 scallops).

*Begin by drizzling the asparagus in olive oil and sprinkling a very small amount (a pinch of each) of salt and pepper on the asparagus. You can toss it around to make sure it is well coated, the oil should be evenly distributed.

*Place the asparagus on a baking sheet and put it in a 425 degree oven for 9-11 minutes. The asparagus only needs to be lightly roasted, this will still give it a little crunch for the salad. Let the asparagus cool completely before cutting each stalk into smaller pieces and throwing it into your salad bowl.

20140618-182105-66065561.jpg

*While the asparagus cools put the beets in a microwave safe container with approximately half an inch of water and cover. Microwave for approximately 3-4 minutes… Unless you’re fancy enough to own a steamer, and then just use that! Once the beets have been steamed the skin comes off easily (although you may need to use a vegetable peeler).

*Chop the beets to your heart’s desire and throw them into your salad bowl

*Next, finely chop the bulb of the green onion, and slice the green stalks of it, throw this all in your salad bowl.

20140618-182132-66092902.jpg

*Crumble the goat cheese and toss! You shouldn’t need any dressing as the residual oil from the roasted asparagus, and the goat cheese will coat everything. Feel free to crumble a little more cheese on top!

For the scallops:

At Green City Market I found a vendor by the name of Savory Accents. Ted Ballweg and his wife began gardening years ago when he was a sales and advertising executive. Ted and I chatted this morning as we stood under his tent shielding ourselves from downpour and he explained that while they started out growing all kinds of peppers, their small business has grown into rubs, oils, jams, and even a delicious salad dressing that I tasted. I sampled a number of awesome products but ultimately decided the chili jam would be awesome on pork chops, sea food, or even baked over brie. They are located in Verona, Wisconsin and Ted and Joan still grow all of the produce used in their products. While I used the chili jam I purchased from Ted this morning, this could easily be substituted with any sweet chili marinade.

*Begin by heating the grill (or if you live in a small studio apartment like I do, your grill pan). I kept mine at a medium flame.

*Spoon about a tablespoon of jam onto the top of each scallop and place it jam side down onto the grill pan (or grill for you fancy folk) and cook each scallop for roughly 4 minutes on each side.

20140618-182200-66120532.jpg

Bon appétit! 

20140618-181908-65948236.jpg

Nutrition:

Calories: 428

Fat: 13 grams

Total Carbohydrates: 43 grams

Protein: 20 grams

Coming Soon: The Farmers Market Series

Whoooa! Hey there, summer! It’s been so long, I had almost forgotten what you looked (felt?!) like!

But for real, summer time in Chicago is finally here! For me, that means weekends filled with one of my favorite things… farmers markets! The foodie in me gets excited about a good farmers market for a number of reasons: 

First, the local vendors – It’s SO cool to be able to support the local economy in Chicago by purchasing directly from the source. You’re helping tons of small family businesses/family owned farms and a lot of that money goes back into the city (not that my numerous parking tickets haven’t been enough for the Department of Revenue but…).

Second,  know where your food is coming from! Most Chicago farmers markets have vendors coming from all over Illinois, Wisconsin, Indiana, Michigan, and Ohio, as well as small businesses from all over the city! Some of these businesses don’t even have store fronts  -they literally just travel from farmers market to farmers market! I think it’s awesome to know that I’m eating fruit that was grown in an orchard in Michigan rather than some plantation outside of Guadalajara; less traveling means less handling and faster farm to table time!

And third, there is nothing tastier than fresh produce and handmade/homemade cheeses and breads! I could spend hours at a farmers market sampling and munching all the fresh fruits and vegetables – and in terms of cooking with those freshest of fresh ingredients: you can truly taste the difference! When you have fresh, high quality ingredients recipes can stand to be much more simple and yet somehow they taste so much more incredible.

I cannot wait to head out to my first farmers market this Saturday morning to explore and find some fresh, local, and in-season ingredients to blog a recipe with. Get out there and check things out! Happy hunting y’all!

Top 10 Chicago Farmers Markets 2014

City of Chicago Farmers Markets Listings

A Guide to Chicago’s Neighborhood Markets

-A.F.


Banana Blueberry Oat Muffins

20130707-214953.jpg

I wish you could smell these right now…

I’m a big Pinterest girl, I pin everything from wedding dresses and DIY projects (that I never end up doing, EVER) to fashion, to recipes. I would have to say though, my most extensive collection of boards/pins absolutely hands-down falls under the “food & drink” category on Pinterest. This recipe that I’ve decided to share today is the adaption of a combination of recipes I found on Pinterest that I have been wanting to try.

I’ve managed to keep this recipe fairly simple, while including NOT 1 but 2 diabetes “super foods”! You’ll actually remember these “super foods” from a previous entry. To this recipe I’ve added blueberries which is one of the most antioxidant rich fruits, and boasts a mere 15 grams of carbohydrates for 3/4 of a cup, and I’ve added ground  cinnamon which has been shown to help decrease/prevent insulin resistance. Blueberries have been a go-to snack or add on to a meal since first being diagnosed with T1D, I keep them in the house as often as possible and have been known to splurge on themwhen they’re out of season at the grocery store, because I really feel like they have fantastic health benefits.

20130707-215013.jpg

Nom, nom, nom…

You’ll also notice that I’ve included ground flax in this recipe. Ground flax is easy to use in baked goods, oat meal, and smoothies and has been shown in preliminary studies to help fight heart disease, cancer, and diabetes. Flax seeds are a great plant-source of Omega-3 Fatty Acids which help heart health, and they also have high levels of fiber.

In this recipe I use honey as an alternative to granulated white sugar. This is a choice I likely would have made prior to yesterday, however Matt and I had a chance to sit down and watch the documentary Hungry for Change. The documentary talks a lot about eliminating sugars and highly processed foods from your diet. I have always felt it important to use the most natural ingredients possible in my cooking, and to use ingredients that boast the most benefits but I also try to maintain a balance between natural, unprocessed, chemical-free foods and cost. Now, I realize that honey is still processed like a sugar by the body however honey is a much healthier and natural alternative to granulated white sugar.

Enough babbling, here’s what you’ll need:

2 1/2 cups gluten-free rolled oats

1 cup plain non-fat greek yogurt

1 tsp. vanilla extract

2 tbsp. ground cinnamon

1/2 cup honey

2 eggs

2 tsp. baking powder

1 tsp. baking soda

2 tbsp. ground flax seeds

2 ripe bananas

1 1/2 cups fresh blueberries

Pre-heat your oven to 400 degrees, and spray a muffin tin to help prevent sticking.

Start by pulsing the oats in a food processor to get them a little ground.

20130707-215004.jpg

Once the oats have been ground up, add everything else EXCEPT for the blueberries to the food processor and pulse until the mixture has been well-blended. Once blended, gently fold the blueberries into the mixture.

20130707-215026.jpg

Spoon the mixture into the muffin tin – these won’t rise a ton so you can spoon to the top of each one.

Bake at 400 for 13-16 minutes. This recipe yields 16 muffins… Enjoy!

20130707-215040.jpg


Calories: 124

Total Fat: 1.9 grams (.3 gram saturated, .7 gram polyunsaturated, .6 grams monounsaturated)

Cholesterol: 23.3 mg

Sodium: 155 mg

Potassium: 87 mg

Total Carbohydrates: 24 grams

Protein: 5 grams

Bon Appétit!

-AF


Chorizo and White Bean Stew

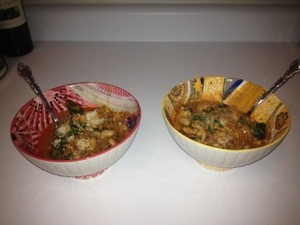
I am not even going to bother explaining my absence from the blog world this time. I am “that person”. I start projects and completely struggle to stay afloat. But when and if I do have time, I have a couple of great recipes I need to get on here! This recipe is one I am especially excited about – I have adapted it from one I originally found in Bon Appetit Magazine on my way home from visiting friends in Denver back in February. We had spent the weekend hiking and running around Denver and this recipe just seemed especially “warming” after a weekend outside!

And before you bombard me with your questions (all 3 of you, that is…) yes, I know that this recipe is tagged as vegetarian… Chorizo? Vegetarian? Just wait, you! While I am not opposed to using real chorizo, it is not nearly as healthy as the alternative I discovered at Trader Joe’s. Traditional chorizo runs about triple the calories of the alternative I was able to find, and while my main focus has most often become the carbohydrates in a meal, calories really remain equally as important. Chorizo is a delicious Mexican sausage that is typically pork and beef based and can be very spicy (and by very spicy, I mean higher than Matt’s general spice tolerance). Trader Joe’s happens to carry a soy-based vegetarian alternative that I was able to trick even the toughest meat critic into eating -with that said, the nutritional facts that I will print after the recipe are based on the use of the soy-alternative to chorizo. The actual meat version has only about 1.5 grams of carbohydrates per serving versus the soy alternative which has approximately 6 grams of carbohydrates per serving so it won’t affect the nutritional facts terribly in the carbs department but again, remember it is triple the calories! Yikes!

Here is what you will need for this delicious stew:

1 pound of Trader Joe’s soy-based vegetarian chorizo

1 large onion, very thinly sliced

2 tbsp. olive oil

4 garlic cloves, finely chopped

a few (3?… 4?… 5?…) sprigs of fresh thyme

1 15-oz can of cannelini beans (white kidney beans), rinsed and drained

2 cups low-sodium chicken broth

1 10-oz bag of baby spinach

1 tsp. smoked paprika

1 tsp. salt

1 tsp. pepper

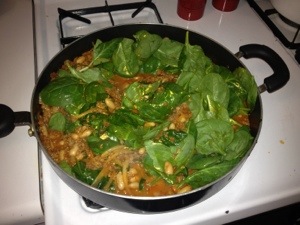
To start, begin heating the “chorizo” in a skillet over medium heat, and after a few minutes add the garlic, onion, thyme and oil to the skillet. Let the garlic and onion mixture cook down before adding the white beans and broth. Let this cook on medium low heat for 10 minutes, crushing a few beans with the back of the spoon to help thicken the sauce a bit.  Season with salt and pepper, and finish by adding the spinach by handfuls and cooking until the spinach wilts down into the stew. Serve with a little parmesan cheese!

20130324-211222.jpg

20130324-211328.jpg

Yields 6 servings – this nutritional information is based on soy-chorizo alternative. I used Trader Joe’s Soy Chorizo

Calories: 238

Total Fat: 10 grams (.6 gram saturated, .5 gram polyunsaturated, 3.3 grams monounsaturated)

Cholesterol: 0 mg

Sodium: 1,012 mg

Potassium: 422 mg

Total Carbohydrates: 23.7 grams

Protein: 14 grams

Bon Appétit!

-AF

Quinoa Casserole

Oh. My. Goodness. …

There’s really no excuse for being this horrible at keeping up a food blog. I won’t even try to explain. (New apartment… new puppy… new job… long hours…). But seriously, no excuses. I stink.

So instead of groveling and begging for forgiveness and promising never to go this long without blogging again, I bring you a FABULOUS, delicious, veggie packed, high protein, fairly low carb, vegetarian recipe. It’s seriously delicious.

20130121-212027.jpg

Quinoa is a protein packed grain that originates from Peru and until recently it was still pretty obscure. From a diabetic standpoint it boasts tons of protein and amino acids for only 31 grams of carbohydrates per serving. While I am not crazy about the taste of it plain, it’s delicious when added to salads and casseroles.

So back to the recipe. Delicious. Seriously. And so good on a night like tonight when it’s below zero with windchill and all I want to do is hibernate instead of go to work in the morning. We’ll call it “healthy comfort food”.

Here’s what you need:

1 1/2 cups of dry quinoa

3 cups of low sodium chicken broth

1 red bell pepper finely chopped

1 green bell pepper finely chopped

3 green onions chopped

4-6 large white button mushrooms chopped

2 tsp. minced garlic

1 box chopped frozen spinach, defrosted and all liquid squeezed out

1 tbsp. olive oil

1 cup skim milk

2 cups shredded cheddar cheese

1/2 cup shredded low fat mozzarella cheese

3/4 cup panko bread crumbs

1 tsp. salt

1/2 tsp. pepper

1/2 tsp. chili powder

1 tsp. red pepper flakes

2 tbsp. yellow mustard

Directions:

Preheat oven to 375

In a large skillet over medium high heat, add the olive oil. Let the oil heat up before adding the chopped peppers, green onions, spinach, and mushrooms. Saute until the peppers have softened and then add the garlic. Saute for another 30 seconds.

Add the quinoa, broth, salt, pepper, chili powder, red pepper flakes, and mustard and then bring the contents of the skillet to a boil. Reduce the heat and simmer covered for another 15 minutes. Make sure all the liquid has been absorbed…

Turn off the heat and add the cheddar cheese and skim milk to the mixture, stir well to combine. Pour the contents of the skillet into a lightly greased casserole dish (whatever you have works…). Mix the panko bread crumbs and mozzarella cheese and sprinkle the mixture on top of the casserole. Drizzle the top with a little more olive oil, and bake for 30 minutes.

20130121-212007.jpg

Yields 6 servings

Calories: 423

Total Fat: 21.5 grams (10.3 grams saturated, 0.8 gram polyunsaturated, 6.2 grams monounsaturated)

Cholesterol: 52.8 mg

Sodium: 690 mg

Potassium: 423.7 mg

Total Carbohydrates: 47 grams

Protein: 24 grams

Bon Appétit!

-AF

Whole Wheat Cinnamon Banana Bread

Hi again friends! It’s been a WILD ride! I went from having all 4 wisdom teeth out in December (and thinking I would blog a good BABYFOOD recipe) to flying through the holidays and waking up in… March? Yes, that’s right, I procrastinate with the best of them! But in my defense, I have stayed involved! On March 25th I will be running Bank of America’s Shamrock Shuffle (8k) for the Chicago Diabetes Project, I raised $300 for the cause! I also had the recent pleasure of meeting the founder of Jimmy Insulin, a fabulous organization that started to help beginner diabetics and their caretakers/family/etc. find mentors in more experienced diabetics. What an amazing idea!

So I suppose you’re all here for whole wheat cinnamon banana bread? It’s not quite my mom’s chocolate chip banana bread, but I had to make it a little healthier! Recent studies have had mixed results, however it has been shown in quite a few that cinnamon can actually reduce insulin resistance therefore showing lower blood-glucose levels in many Type 1 diabetics. Results were slightly different for those with Type 2. For this reason, and for the amazing flavor it gives, I tossed a little cinnamon in! This banana bread will NOT lower your blood sugar, but the practice of using cinnamon in recipes that warrant it isn’t a bad idea. I also changed out half of the unbleached flour for whole wheat flour. Not a bad healthy twist on a super yummy classic!

In recent weeks I have also learned a great deal about coconut oil. Coconut oil boasts resistance to both viruses and bacteria. It has anti-microbial and anti-fungal properties and can be used for WAY more than you think. I have seen coconut oil used for diaper rash to facial cleanser but for today’s all intensive purposes coconut oil is the PERFECT substitute for butter or margarine. The jury’s not out yet on whether or not coconut oil is healthier but it’s the right consistency for a substitution. It should be noted that coconut oil actually has a HIGHER content of saturated fat as opposed to butter, it is also higher in calories. Some still say that butter might actually be healthier, however other big names in the health industry have jumped the coconut oil bandwagon.

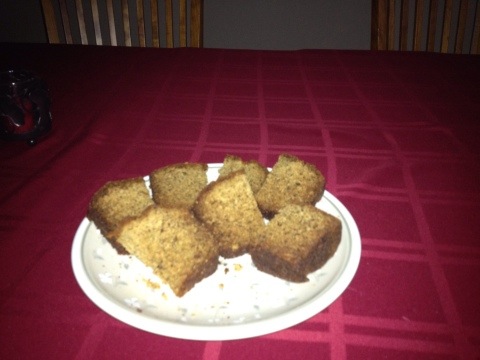
20120305-170736.jpg

One of the best feelings I remember as a kid was coming home from school to the smell of my mom’s amazing chocolate chip banana bread. While she didn’t bake it often, it was a HUGE treat when she did. To this day she still bakes it anytime we end up with mushy bananas in the house (or when my little brother comes home from school). Upon coming home to some mushy bananas today, I decided it was time to blog this recipe!

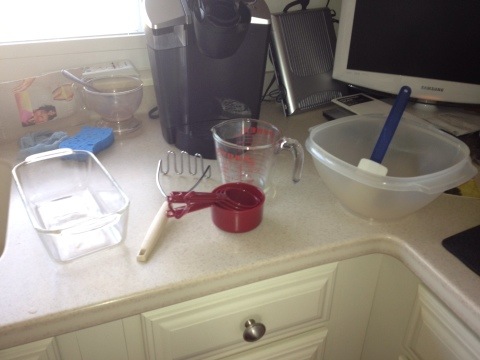
It’s a very simple recipe and the kitchen stays pretty clean! All you’ll need is a glass bread pan, a masher, a big bowl, liquid measuring cup (or something else to soften the butter in), dry ingredient measuring cups, and a decent spatula.

20120305-144658.jpg

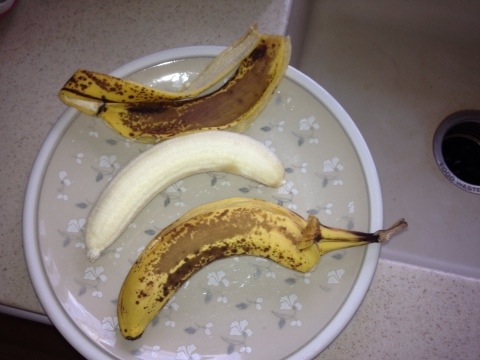
There’s a reason we always bake with brown bananas -they are a lot easier to mash, and in all honesty they make for a much better consistency. Using whole wheat flour dries the bread out a little, where the bananas add a lot of moisture. My batch ultimately ended up really well with two bananas, but three would have been great too. If for some reason you decide to use regular unbleached white flour I would stick to two bananas or the bread can get too mushy.

20120305-144714.jpg

Ingredients:

2-3 brown(ish) bananas

1 cup sugar

8 tbsp. room temperature coconut oil

1 tsp vanilla extract

1 cup unbleached white flour

1 cup whole wheat flour

1 generous tbsp. baking soda

2 room temperature eggs

2 tbsp. ground cinnamon

1. Preheat your oven to 350 degrees

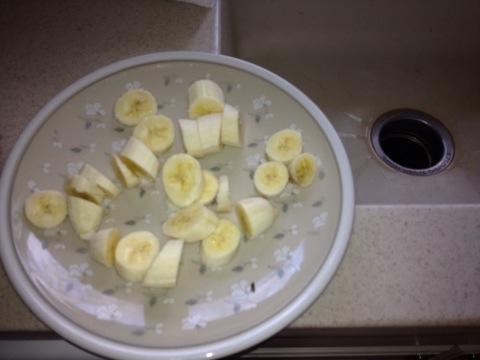
2. Cut up the bananas (makes them easier to mash)

20120305-144739.jpg

3. If your butter isn’t mushy/room temperature pop the whole stick in the microwave for 30 seconds tops – you don’t want to add hot butter to your mixture, you’ll cook the eggs before you even bake the bread!

20120305-144748.jpg

20120305-144759.jpg

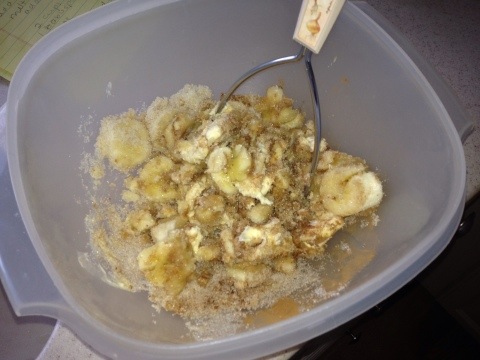
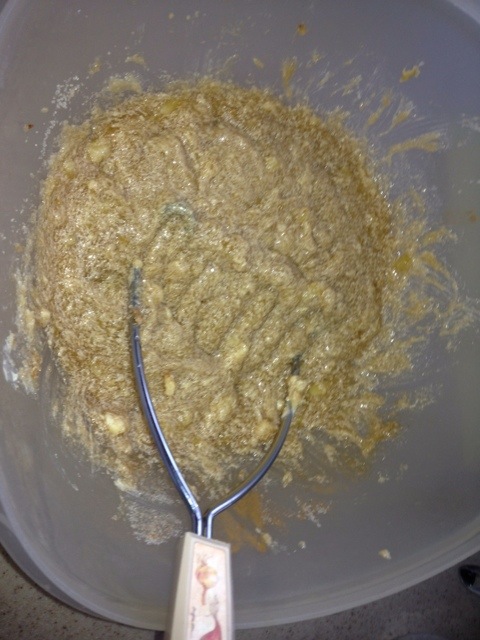
4. In the big bowl, mash the bananas, butter, sugar, vanilla, and cinnamon

20120305-144809.jpg

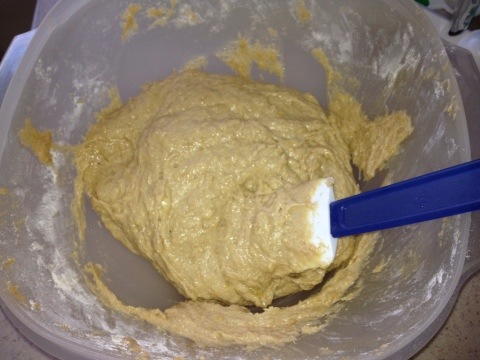
It should look dark in color and be a somewhat thin, soupy consistency

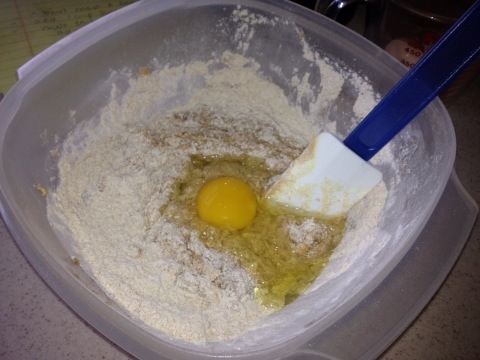
5. Add one cup of flour and one egg to the mixture and fold it in to the mash. Repeat this step adding the baking soda as well. Stir until the mixture is completely combined.

20120305-144823.jpg

20120305-144832.jpg

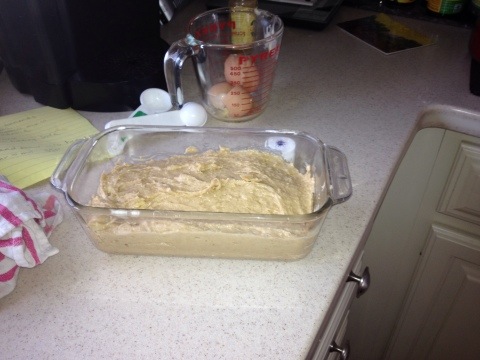
Pour the mixture into an ungreased glass bread pan. If it is a dark pan (i.e. tin or metal) you probably need to grease it. The batter will be a little thick, it may need some coaxing from a spatula.

20120305-144840.jpg

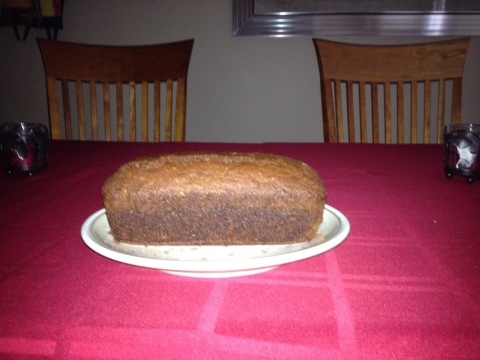
Bake for 1 hour to 1 hour and 10 minutes. Let it sit and cool for another hour to two hours. Do not try to take it out of the pan before that – it will fall apart!

20120305-170724.jpg

Yields 16 servings – this nutritional information is based on two bananas used in this recipe.

Calories: 185

Total Fat: 5.3 grams (1.5 gram saturated, 1.4 gram polyunsaturated, 2 grams monounsaturated)

Cholesterol: 23 mg

Sodium: 290 mg

Potassium: 71 mg

Total Carbohydrates: 27 grams

Protein: 2.8 grams

Bon Appétit!

-AF
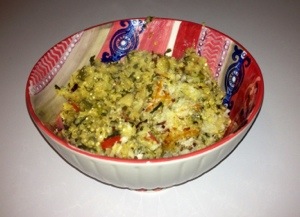
Tangy Roasted Chicken with Sautéed Squash

20111210-194958.jpg

Well, it’s been a while! Between a few crazy weeks at work, and a lot of running around on the weekends, I’ve somewhat neglected this blog. The good news is, we’re coming very close to my much anticipated winter break which means: plenty of time to cook and blog!

Last night some friends joined my boyfriend and I for dinner, and with it having been my first time cooking for our friends I was a little nervous about testing a recipe. Lucky for me, I had the chicken in the oven by the time our friends came over and the entire apartment smelled fantastic!

With all the craziness that is my life lately, comfort food just sounded like a great idea for this entry, and comfort food it was! While browsing the completely amazing (and free) Foodily app on my iPhone, I came across this recipe a few weeks ago. At first I was reluctant to try it because it called for chicken thighs – I have never been keen on anything other than white meat, but it was definitely worth trying –  this recipe became an instant favorite!

In terms of the nutritional value of white meat versus dark meat, I was able to find that while dark meat (with the skin) is higher in calories, cholesterol and fat it is also much higher in iron. With that said, if you’re not a frequent meat eater (I’m not) than opt for dark meat – it has more nutrients!

I made a few changes to the recipe, subbing out the butter for smart balance spread and changing the quantity of some of the spices to cater to my boyfriend’s low spice tolerance, and it turned out fantastic! For those who like it a little spicier, feel free to add more spice, it won’t change the nutrition facts at all! (Sidenote: The fabulous part about cooking with a lot of herbs and spices is that they add a ton of flavor without adding calories and carbohydrates!)

For the chicken you will need:

8 chicken thighs, bone in, skin on

3 tbsp smart balance buttery spread with olive oil

3 tbsp olive oil

juice of one lemon

1/2 tsp salt

1/2 tsp ground black pepper

2 heaping tbsp paprika

2 tsp worcester sauce

1 tbsp dijon mustard

1/4 tsp red pepper flakes

3 garlic cloves minced

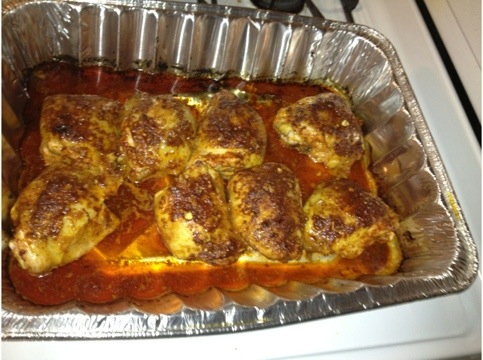
Begin by melting the butter in a sauce pan with the olive oil. Do this on medium heat, and turn off the heat as soon as the butter is melted. After the butter melts add the rest of the ingredients. Place all 8 chicken thighs in a roasting pan and drizzle the sauce over the chicken in your roasting pan – use all of it! DO NOT WASH YOUR SAUCE PAN YET – you will need it for your sautéed squash! Place the chicken in a pre-heated 400 degree oven and cook for 40 – 45 minutes, basting the chicken every 10 minutes. (I didn’t have a baster so I spooned the liquid back over the chicken as best I could).

20111210-194858.jpg

Ingredients for the sautéed squash:

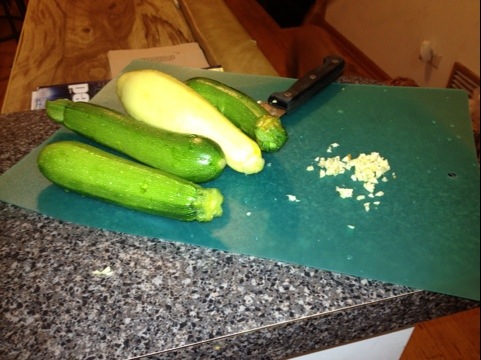
3 small zucchinis, 1 small yellow squash (as pictured below)

20111210-194916.jpg

1 clove of garlic minced

2 tbsp olive oil

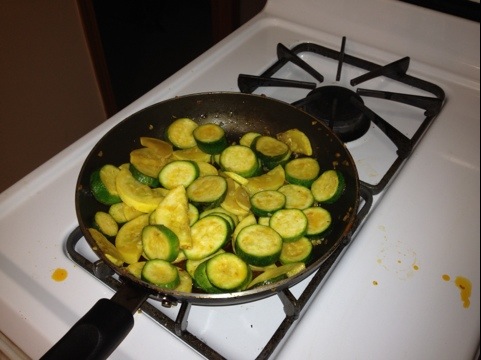
Chop the squash so that it is about 1/4″ thick, if the pieces are huge (as my yellow squash was, cut them in half). Heat the olive oil over medium heat, add the minced garlic while the oil is heating. When the garlic and oil start to form little bubbles it’s time to add your squash! Add all of it, and cook until tender. The squash will pick up some of the flavor left in the pan from the sauce you have made for the chicken and it will be DELICIOUS!

20111210-194943.jpg

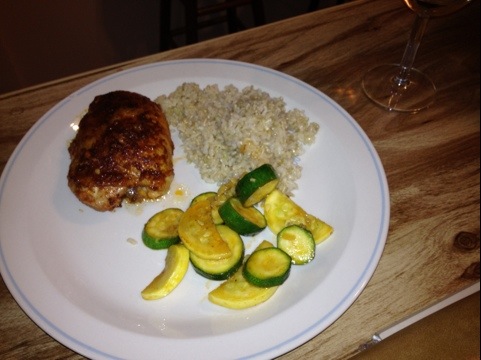
I chose to serve my chicken and squash with brown rice, which is a super easy carbohydrate to measure out – 1/3 of a cup of brown rice is 15 grams of carbohydrates! This is NOT reflected in my nutritional information below, but it is a great serving suggestion!

The nutrition information below reflects the exact amounts used in both recipes above, and reflects the information for 1 serving only.

For the chicken – this recipe yields 8 servings – 1 thigh is equal to 1 serving

Calories: 168.2

Total Fat: 11.6 grams (2.4 gram saturated, 2.5 gram polyunsaturated, 6 grams monounsaturated)

Cholesterol: 57.3 mg

Sodium: 276 mg

Potassium: 215.8 mg

Total Carbohydrates: 2.4 grams

Protein: 14 grams

For the squash – this recipe yields 4 servings

Calories: 90

Total Fat: 7 grams (1 gram saturated, 1 gram polyunsaturated, 5 grams monounsaturated)

Cholesterol: 0 mg

Sodium: 300 mg

Potassium: 45 mg

Total Carbohydrates: 11.5 grams

Protein: 2 grams

Bon Appétit!

-AF

White Chili

I am a huge fan of the Food Network’s Giada DeLaurentiis, host of Everyday Italian and Giada At Home. This recipe aired about a year ago on an episode of Giada at Home where Giada’s husband Todd spends the day surfing. While this sounds good after a day at the beach, it sounds even better on a cold fall day! This white chili has such amazing spice; the cumin and fennel are such unique flavors for chili and yet they work so well.

While “healthy chili” sounds quite contradictory, chicken makes a nice hearty base for this dish. This chili is full of lean protein and lots of nutrients from the swiss chard. The final product isn’t as thick as you might expect a chili to be, but it doesn’t quite seem like a soup. This chili is quick and easy to make once the ingredients have been prepped; I recommend doing all the chopping ahead of time so that once the pot is on the stove all you’ll have to do is toss the ingredients in!

White Bean and Chicken Chili

2 tbsp. olive oil

1 large onion chopped (I use white onions for this recipe)

3 tsp. minced garlic

2 pounds ground chicken breast

1 tsp. salt

1 tsp. freshly ground black pepper

2 tbsp. ground cumin

1 tbsp. fennel seeds

1 tbsp. dried oregano

1/2 tsp. crushed red pepper flakes

2 tsp. chilli powder

3 tbsp. flour

2  (15 oz.) cans cannellini beans (white kidney beans) rinsed and drained

1 bunch swiss chard, stems removed, leaves chopped into 1″ pieces

1 (16 oz) package frozen corn, thawed

4 cups low sodium chicken broth

fresh grated parmesan cheese to top

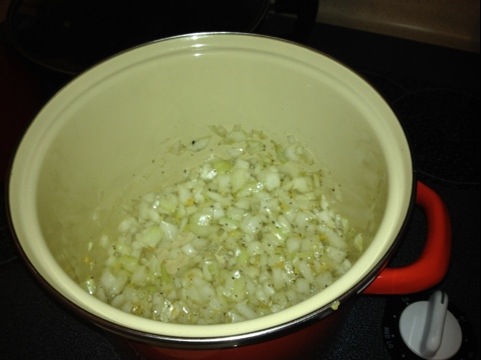
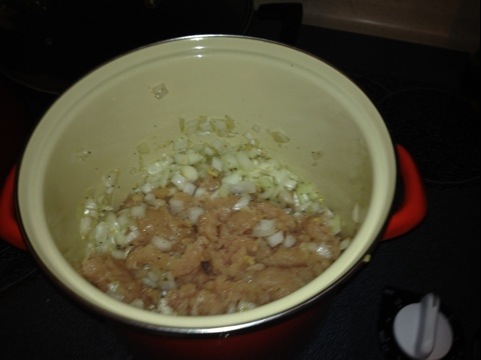
Start by combining the onions, garlic, and olive oil in a large pot over medium heat. Cook until the onions start to become translucent (about 4 minutes).

20111118-172412.jpg

Add the ground chicken and spice mixture and stir frequently until the chicken is cooked.

20111118-172421.jpg

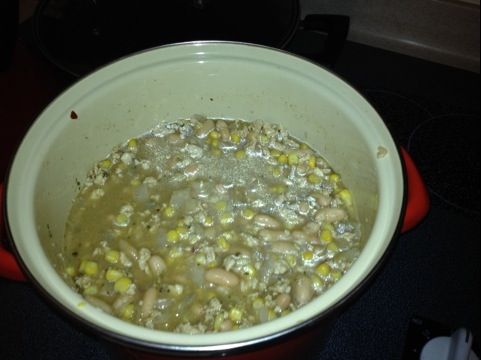
Once cooked add the flour, broth, beans, and corn. Stir to mix.

20111118-172436.jpg

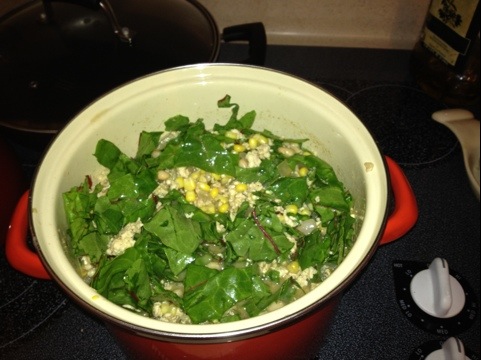
Add the chard, and stir frequently to help it cook down. Chard, like spinach will cook down quickly.

20111118-172450.jpg

Turn the heat down to a simmer, and cover. Cook for a minimum of one hour!

20111118-172502.jpg

The nutrition information is based on the quantity printed above, and 1 hour and 30 minutes of simmer-time (the longer you simmer, the less liquid).

This recipe yields 12, 8 oz servings.

Calories: 256.8

Total Fat: 4.3 grams (1 gram saturated, 1 gram polyunsaturated, 2.6 grams monounsaturated)

Cholesterol: 45.5 mg

Sodium: 654 mg

Potassium: 1,085.5 grams

Total Carbohydrates: 30.8 grams

Protein: 25.8 grams

Bon Appétit!

-AF
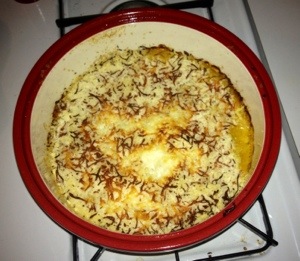
Baked Oatmeal

20111113-201007.jpg

The air outside is crisp and chilly, the leaves on the trees are turning beautiful shades of deep red and burnt orange, and the ONLY thing I find myself craving more than Mexican drinking chocolate (that’s off limits…) is baked oatmeal. Granted I just came across the recipe last night, my mouth is WATERING. The funniest part is, I have never been a big oatmeal person. I like oatmeal cookies, as long as there are NO raisins, but as a child I actually used to gag and choke to get a bowl of oatmeal down in the morning.

I recently read an article listing “diabetes superfoods” and low and behold: oatmeal was on the list under the heading of “whole grains”. While oatmeal does contain carbohydrates, you get the most nutrition for the carbs you are ingesting. Oatmeal is high in fiber and some can actually contain a lot of protein.

Anyway, back to the recipe – This recipe was found on Foodily, my new favorite iPhone app – I made a few tweaks and managed to come up with something health-conscious AND delicious!

The original recipe did not contain dried cherries or roasted almonds but it seemed a little too plain to me, and after cutting back on the brown sugar I figured the cherries might be a little added sweetness with some actual nutritional value. Please note that you can leave out the dried cherries and slivered almonds, and you can always add your own trimmings. The nutritional value was calculated with the dried cherries and roasted slivered almonds.

1 cup milk

1 tsp. salt

2 tsp. baking powder

2 eggs lightly whisked

1/2 cup brown sugar, packed

1/2 cup Smart Balance (I used Smart Balance Buttery Sticks, used 1 stick), melted

3 cups Quaker quick oats, raw

1/2 cup dried cherries

1/4 cup slivered dry roasted almonds

Combine all of the ingredients, mix well. Pour the ingredients into a greased (I used Spectrum Expeller Pressed Canola Spray Oil with Butter Flavor) 8×8 pan. Bake at 350 degrees for 45 minutes. The nutrition information below is based on this dish yielding 9 servings.

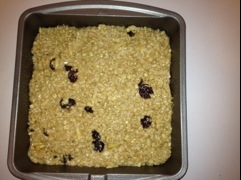
20111113-192932.jpgBefore baking…

I let the baked oatmeal sit for a good half hour before trying to cut it, and had no problem cutting when it came time.

20111113-201039.jpg

Nutrition Information:

Calories: 286

Total Fat: 12.7 g (saturated: 3, polyunsaturated: 3.5, monosaturated: 5.3)

Cholesterol: 37 mg

Potassium: 267 mg

Carbohydrates: 41.4 g


Bon appétit!

-AF